

Installing the Kubernetes Dashboard and managing the Cluster using kubectl
Recommended steps after a Kubernetes Cluster deployment #
After installing a Kubernetes Cluster it is recommended to:
- Check the health of the cluster
- Check networking status
- Install kubectl to administer the cluster using a command line
- Install the Kubernetes Dashboard
This tutorial is a continuation of Kubernetes Cluster using Vagrant and Ansible.
Prerequisites:
- Have a running Kubernetes cluster created with Kubernetes Cluster using Vagrant and Ansible
We will use the vagrant ssh command to access the Kubernetes servers.
jruiz@XPS13:~/git/github/ansible-vbox-vagrant-kubernetes$ vagrant ssh k8s-m-1
Welcome to Ubuntu 20.04 LTS (GNU/Linux 5.4.0-31-generic x86_64)

 * Documentation:  https://help.ubuntu.com
 * Management:     https://landscape.canonical.com
 * Support:        https://ubuntu.com/advantage

  System information as of Fri 31 Jul 2020 05:50:30 PM UTC

  System load:  0.4               Users logged in:          0
  Usage of /:   6.1% of 61.31GB   IPv4 address for docker0: 172.17.0.1
  Memory usage: 44%               IPv4 address for eth0:    10.0.2.15
  Swap usage:   0%                IPv4 address for eth1:    192.168.50.11
  Processes:    163               IPv4 address for tunl0:   192.168.116.0

95 updates can be installed immediately.
36 of these updates are security updates.
To see these additional updates run: apt list --upgradable

This system is built by the Bento project by Chef Software
More information can be found at https://github.com/chef/bento
Last login: Fri Jul 31 17:46:30 2020 from 10.0.2.2
vagrant@k8s-m-1:~$Check Syslog #
Open a Vagrant SSH to k8s-m-1 and check syslog file for errors
jruiz@XPS13:~/git/github/ansible-vbox-vagrant-kubernetes$ vagrant ssh k8s-m-1
Welcome to Ubuntu 20.04 LTS (GNU/Linux 5.4.0-31-generic x86_64)
...
vagrant@k8s-m-1:~$ tail -f /var/log/syslog
Apr 20 14:32:05 k8s-m-1 systemd[7025]: Listening on GnuPG cryptographic agent and passphrase cache (restricted).
Apr 20 14:32:05 k8s-m-1 systemd[7025]: Reached target Paths.
Apr 20 14:32:05 k8s-m-1 systemd[7025]: Reached target Timers.
Apr 20 14:32:05 k8s-m-1 systemd[7025]: Listening on GnuPG cryptographic agent and passphrase cache.
Apr 20 14:32:05 k8s-m-1 systemd[7025]: Listening on GnuPG cryptographic agent (ssh-agent emulation).
Apr 20 14:32:05 k8s-m-1 systemd[7025]: Reached target Sockets.
Apr 20 14:32:05 k8s-m-1 systemd[7025]: Reached target Basic System.
Apr 20 14:32:05 k8s-m-1 systemd[7025]: Reached target Default.
Apr 20 14:32:05 k8s-m-1 systemd[1]: Started User Manager for UID 1000.
Apr 20 14:32:05 k8s-m-1 systemd[7025]: Startup finished in 29ms.
^C
Check that Calico Networking is Running #
Open a Vagrant SSH to k8s-m-1 and execute kubectl get pods --all-namespaces
jruiz@XPS13:~/git/github/ansible-vbox-vagrant-kubernetes$ vagrant ssh k8s-m-1
Welcome to Ubuntu 20.04 LTS (GNU/Linux 5.4.0-31-generic x86_64)
...
vagrant@k8s-m-1:~$ kubectl get pods --all-namespaces
NAMESPACE     NAME                                       READY   STATUS    RESTARTS   AGE
default       nginx-deployment-6dd86d77d-l9dd9           1/1     Running   1          19h
default       nginx-deployment-6dd86d77d-qr6dl           1/1     Running   1          19h
kube-system   calico-kube-controllers-5cbcccc885-pwgmg   1/1     Running   2          21h
kube-system   calico-node-2cj4q                          1/1     Running   2          21h
kube-system   calico-node-q25j7                          1/1     Running   2          21h
kube-system   calico-node-vkbj5                          1/1     Running   2          21h
kube-system   coredns-fb8b8dccf-nfs4w                    1/1     Running   2          21h
kube-system   coredns-fb8b8dccf-tmrcg                    1/1     Running   2          21h
kube-system   etcd-k8s-m-1                               1/1     Running   2          21h
kube-system   kube-apiserver-k8s-m-1                     1/1     Running   2          21h
kube-system   kube-controller-manager-k8s-m-1            1/1     Running   2          21h
kube-system   kube-proxy-jxfjf                           1/1     Running   2          21h
kube-system   kube-proxy-ljr26                           1/1     Running   2          21h
kube-system   kube-proxy-mdgmb                           1/1     Running   2          21h
kube-system   kube-scheduler-k8s-m-1                     1/1     Running   2          21h
kube-system   kubernetes-dashboard-5f7b999d65-l8bsx      1/1     Running   1          19h
Administer the Kubernetes Cluster from your host #
Install kubectl to administer the Kubernetes Cluster from your development host
sudo apt-get update && sudo apt-get install -y apt-transport-https
sudo mkdir -p /etc/apt/keyrings
curl -fsSL https://pkgs.k8s.io/core:/stable:/v1.XX/deb/Release.key | sudo gpg --dearmor -o /etc/apt/keyrings/kubernetes-apt-keyring.gpg
# Replace v1.XX with the Kubernetes minor version of your cluster (see kubernetes.io/docs/tasks/tools/install-kubectl-linux)
echo 'deb [signed-by=/etc/apt/keyrings/kubernetes-apt-keyring.gpg] https://pkgs.k8s.io/core:/stable:/v1.XX/deb/ /' | sudo tee /etc/apt/sources.list.d/kubernetes.list
sudo apt-get update
sudo apt-get install -y kubectl
Copy the Kubernetes config to your local home .kube dir
#Create the configuration directory
$ mkdir -p ~/.kube
#Find the SSH port of the k8s-m-1 server
$ vagrant port k8s-m-1
The forwarded ports for the machine are listed below. Please note that
these values may differ from values configured in the Vagrantfile if the
provider supports automatic port collision detection and resolution.
    22 (guest) => 2222 (host)
#Copy the file using scp (ssh password is vagrant)
$ scp -P 2222 vagrant@127.0.0.1:/home/vagrant/.kube/config ~/.kube/config
vagrant@127.0.0.1's password: vagrant
config                                                                     100% 5449   118.7KB/s   00:00
List the Kubernetes cluster nodes using kubectl from your development host:
$ kubectl cluster-info
Kubernetes master is running at https://192.168.50.11:6443
KubeDNS is running at https://192.168.50.11:6443/api/v1/namespaces/kube-system/services/kube-dns:dns/proxy
To further debug and diagnose cluster problems, use 'kubectl cluster-info dump'.
$ kubectl get nodes --all-namespaces
NAME      STATUS   ROLES    AGE     VERSION
k8s-m-1   Ready    master   12m     v1.18.6
k8s-n-1   Ready    <none>   10m     v1.18.6
k8s-n-2   Ready    <none>   7m43s   v1.18.6
$ kubectl get pods --all-namespaces
NAMESPACE              NAME                                         READY   STATUS    RESTARTS   AGE
kube-system            calico-kube-controllers-578894d4cd-nf4pm     1/1     Running   0          12m
kube-system            calico-node-8pv65                            1/1     Running   0          8m2s
kube-system            calico-node-nmqmr                            1/1     Running   0          12m
kube-system            calico-node-zcdd4                            1/1     Running   0          10m
kube-system            coredns-66bff467f8-6jnkg                     1/1     Running   0          12m
kube-system            coredns-66bff467f8-qs54m                     1/1     Running   0          12m
kube-system            etcd-k8s-m-1                                 1/1     Running   0          12m
kube-system            kube-apiserver-k8s-m-1                       1/1     Running   0          12m
kube-system            kube-controller-manager-k8s-m-1              1/1     Running   0          12m
kube-system            kube-proxy-j8gwm                             1/1     Running   0          10m
kube-system            kube-proxy-jxww4                             1/1     Running   0          12m
kube-system            kube-proxy-lvkd2                             1/1     Running   0          8m2s
kube-system            kube-scheduler-k8s-m-1                       1/1     Running   0          12m
kubernetes-dashboard   dashboard-metrics-scraper-6b4884c9d5-ttqtt   1/1     Running   0          4m24s
kubernetes-dashboard   kubernetes-dashboard-7b544877d5-5hjr6        1/1     Running   0          4m24s
Install the Kubernetes Dashboard #
The Kubernetes Dashboard provides a web-based user interface to deploy applications, troubleshoot and manage resources. The same functionality is provided through the command line tools but under a very nice web application with charts and beautiful screens.
To deploy the Web UI (Dashboard) or Kubernetes Dashboard run the following command:
kubectl apply -f https://raw.githubusercontent.com/kubernetes/dashboard/v2.0.0/aio/deploy/recommended.yamlThe deployment file will publish the Kubernetes Dashboard using a ClusterIP service as shown below using TargetPort 8443:
$ kubectl -n kubernetes-dashboard describe service kubernetes-dashboard
Name:              kubernetes-dashboard
Namespace:         kubernetes-dashboard
Labels:            k8s-app=kubernetes-dashboard
Annotations:       kubectl.kubernetes.io/last-applied-configuration:
                     {"apiVersion":"v1","kind":"Service","metadata":{"annotations":{},"labels":{"k8s-app":"kubernetes-dashboard"},"name":"kubernetes-dashboard"...
Selector:          k8s-app=kubernetes-dashboard
Type:              ClusterIP
IP:                10.98.98.132
Port:              <unset>  443/TCP
TargetPort:        8443/TCP
Endpoints:         192.168.122.134:8443
Session Affinity:  None
Events:            <none>
To access the Kubernetes Dashboard from our workstation, a NodePort will be created to publish the kubernetes-dashboard following the Publish an Application Outside Kubernetes Cluster instructions.
The file kubernetes-dashboard-service-np.yaml (included in the Kubernetes Cluster using Vagrant and Ansible tutorial source code):
- Creates an admin-user
- Assigns the cluster-admin role
- Creates a new NodePort service that publishes TargetPort 8443 as NodePort 30002
kubernetes-dashboard-service-np.yaml
---
apiVersion: v1
kind: ServiceAccount
metadata:
  name: admin-user
  namespace: kubernetes-dashboard
---
apiVersion: rbac.authorization.k8s.io/v1
kind: ClusterRoleBinding
metadata:
  name: admin-user
roleRef:
  apiGroup: rbac.authorization.k8s.io
  kind: ClusterRole
  name: cluster-admin
subjects:
- kind: ServiceAccount
  name: admin-user
  namespace: kubernetes-dashboard
---
kind: Service
apiVersion: v1
metadata:
  namespace: kubernetes-dashboard
  name: kubernetes-dashboard-service-np
  labels:
    k8s-app: kubernetes-dashboard
spec:
  type: NodePort
  ports:
  - port: 8443
    nodePort: 30002
    targetPort: 8443
    protocol: TCP
  selector:
    k8s-app: kubernetes-dashboard
Apply the changes
$ kubectl apply -f kubernetes-dashboard-service-np.yaml
serviceaccount/admin-user created
clusterrolebinding.rbac.authorization.k8s.io/admin-user created
service/kubernetes-dashboard-service-np created
Obtain an authentication token to use on the Kubernetes Dashboard authentication realm
$ kubectl -n kubernetes-dashboard describe secret $(kubectl -n kubernetes-dashboard get secret | grep admin-user | awk '{print $1}')
Name:         admin-user-token-f9zj6
Namespace:    kubernetes-dashboard
Labels:       <none>
Annotations:  kubernetes.io/service-account.name: admin-user
              kubernetes.io/service-account.uid: 29edd185-e261-44e0-ac15-f73d4fccd4fa
Type:  kubernetes.io/service-account-token
Data
====
ca.crt:     1025 bytes
namespace:  20 bytes
token:      eyJhbGciOiJSUzI1NiIsImtpZCI6Ikg0c21nUjZ5Rm00cktvRmdMR0FsRXZicVdyYWZvNkQ0MDQ2ck1IV3ZWeHcifQ.eyJpc3MiOiJrdWJlcm5ldGVzL3NlcnZpY2VhY2NvdW50Iiwia3ViZXJuZXRlcy5pby9zZXJ2aWNlYWNjb3VudC9uYW1lc3BhY2UiOiJrdWJlcm5ldGVzLWRhc2hib2FyZCIsImt1Vybdadas2ZXMuaW8vc2VydmljZWFjY291bnQvc2VjcmV0Lm5hbWUiOiJhZG1pbi11c2VyLXRva2VuLWY5emo2Iiwia3ViZXJuZXRlcy5pby9zZXJ2aWNlYWNjb3VudC9zZXJ2aWNlLWFjY291bnQubmFtZSI6ImFkbWluLXVzZXIiLCJrdWJlcm5ldGVfaslvL3NlcnZpY2VhY2NvdW50L3NlcnZpY2UtYWNjb3VudC51aWQiOiIyOWVkZDE4NS1lMjYxLTQ0ZTAtYWMxNS1mNzNkNGZjY2Q0ZmEiLCJzdWIiOiJzeXN0ZW06c2VydmljZWFjY291bnQ6a3ViZXJuZXRlcy1kYXNoYm9hcmQ6YWRtaW4tdXNlciJ9.dIUpYhx0G8GvC26GQsHGr7wvWu0THntLHWGf1P-Ep7nWSeIBkM-QLtUxmOv3q1zz45xIyhTAuquZegQ1OH6kgD6UvPdf2GdfO6LbFU_yAWuMtYWTSgDwIbrP7L1yOBPwdrQFN1xjjHR6luc92g50vVdAetGEwXU5MN-dkEv-3Vu6bLJi9FbUWCdKw-I9kVqCka01acy6dJQdyvrI8Wr0y8tTA0gI3LxjAsS_WpUmgskJIsF2aKDmCvBA_Sh8bZfHmLEuFSRnOFbjFyH9w_tx8Ia7gqnMzrr3c43SvtNX99BfwRiVGpZ1UpKmPRwBAmnj53j2TrKT1vNQyD58btXlfw
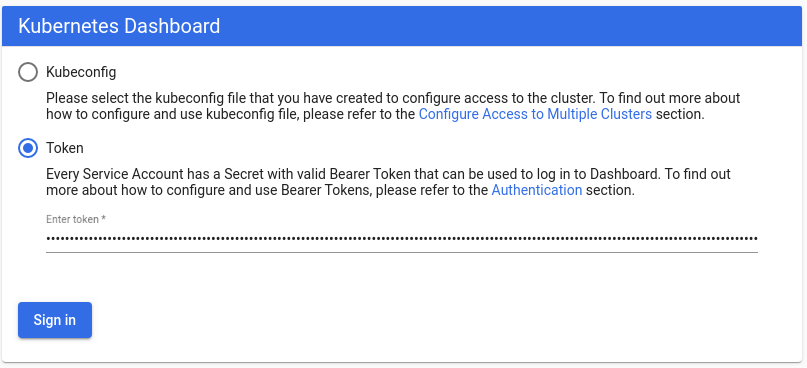
Access the Kubernetes Dashboard using the URL https://192.168.50.11:30002/#/login using the token printed before:

Please read other ways to publish the Kubernetes Dashboard on the Kubernetes Dashboard documentation.
Useful Vagrant commands #
#Create the cluster or start the cluster after a host reboot
vagrant up
#Execute again the Ansible playlist in all the vagrant boxes, useful during development of Ansible playbooks
vagrant provision
#Execute again the Ansible playlist in the Kubernetes node 1
vagrant provision k8s-n-1
#Poweroff the Kubernetes Cluster
vagrant halt
#Open an ssh connection to the Kubernetes master
vagrant ssh k8s-m-1
#Open an ssh connection to the Kubernetes node 1
vagrant ssh k8s-n-1
#Open an ssh connection to the Kubernetes node 2
vagrant ssh k8s-n-2
#Stop all Vagrant machines (use vagrant up to start)
vagrant halt
Next steps #
After installing Kubernetes using Vagrant:
- Learn how to Publish an Application Outside Kubernetes Cluster using a NodePort.
- Create your own Docker image, publish it to a Docker registry, and deploy it in Kubernetes. See an example in section Building the Color Application from the Istio Patterns: Traffic Splitting in Kubernetes (Canary Release) tutorial.
- Add a service mesh to connect all the micro-services, see Installing Istio in Kubernetes under VirtualBox.